I had been working on some products for an upcoming release, so I thought I would go ahead and release them today in honor of this hop and Ukraine. Three of our new products will be a fundraiser effort, with a portion of each sale going to help Yana and her relief efforts.
Here are a couple of cards made for this hop using some new releases. These were all created with Ukraine in mind and I hope you will find some inspiration.
For a Ukrainian theme, I created this card using their flower of a sunflower. This is a new stamp set called Peace Not War. The Peace Sign Die is an existing product in our shop, but I thought it paired so nicely with the theme of this hop.
For this next card, I used our new Floral Peace Sign Die combination set. This bundle includes a 3 layer stencil set, a metal die and hot foil plate to created this beautiful image. I also paired the image with a sentiment from the new 4x6 stamp set called Peace Not War. I have seen so many blue and yellow cards, but I wanted to do a little something different for this one.
Next, a more traditional card using the new Floral Peace Sign bundle!
Our Design Team member Michelle McDaniel created this beauty using the new Peace Not War Stamp Set.
Be sure to check out the new release on our website -every order counts with a purchase of a new release item towards a donation to Yana in Ukraine!
Thanks for stopping by, your next stop is Tifany at Ink Blog Shop!
]]>I had all the products ready to go. I remember receiving my first shipment of clear stamps. I was so so so excited to open up those boxes to see all my hard work and designs turn into actual physical products, complete with packaging. And then to turn around and offer them to fellow card makers. Just so great.
In those past three years, I have anticipated release days, struggled with manufacturers, cried over emails, made thousands of card samples and shipped out each package with love and care, always striving to do my very best work.
Running this business has definitely had it's ups and downs, difficult conversations and loads of hard work, but I still love it to this day.
Why would you love something that takes so much work, you ask? It's because of YOU - my customers. My fans who have been with me since day one, or have joined along the way. It's all the cards you have shown me you've created using my products. It's the kind messages and replies. I love you guys so much and I love creating products you love using.
So thank you. From the bottom of this small business woman's heart.
Be sure to check out all 16 new products we are releasing today!
]]>Quick and simple cards are so much fun to make. Stencils have become a staple in card making these days and can pack a punch! I am also sneak peeking a stamp set that will be available with the new release on March 1.
I decided to use one stencil and one stamp on both of the cards I am posting today.
I am featuring the Sparkling Palms Stencil and the new (available March 1) Be Still Stamp Set.
For this first card, I used a rectangle die to create a paper stencil for the light green rectangle box in the center and blended in green ink. I then used the palms stencil and added the leaves on the side. I adore this sentiment and honestly, I so needed it. It is right where I am right now in life and a great reminder ---faith over fears!
For the second card, I blended on the palms stencil and then shifted it to add another layer of overlapping leaves. I stamped the sentiment and added some embroidery floss and a heart cut with the Nesting Heart Die out of Holographic Cardstock.
Hope you feel inspired, Make sure to join us on March 1 for the new release! There are some amazing new products that will be available in the shop!
]]>March 1, Erin will be releasing some new stamps, dies and stencils. I can't wait for you to see everything but right now I can show you a little sneak of an awesome saying that is on one of the stamp sets. This saying is something I try and remind myself ALL the time. It's hard to do sometimes because just giving in is easier. But (especially these days) we need to be strong and let our faith help us.
The background was done using distress inks and using the Tie Dye Layering Stencil set. LOVE LOVE LOVE that set - if you don't have it yet, you need to get it! So easy to use and such a WOW factor!
Thanks for stopping by!
]]>Hello Everyone!
It’s Ceal, here. Today I am sharing a card made with my favorite die ever, Jumbo Skinny Rainbow. I love all things rainbow so I was so excited when this die was released. This is one rainbow die that should be in every crafters collection. It pairs so well with other ELC products.
To create my card I started with a white top folding card base and a white panel. I created the clouds by using an older stencil from her first rainbow kit along with the Blending Brushes. I used the Jumbo Skinny Rainbow die and cut out all the rainbow colors with it. Next using that same die I cut it out of my cloudy panel and placed the colorful arches back in the negative space. I added a cloud to the bottom with a die from my stash and to finish the card I added the Shine die cut out of holographic paper.
I love it when you can use one supply and make multiple cards using the left over pieces and with this die you can do just that.
I love Erin‘s eclectic style, she never disappoints!
Until the next time,
Stay Crafty <3
]]>I LOVE this rainbow stencil. It comes in a 2-pack with this smaller version and a larger version, and I really like the wonky lines. I masked it off line by line and blended some pastel-colored inks.
See those tiny clouds? One of the genius things about these stencils is the cloud edge on the bottom of each of them. Brilliant! I lightly dabbed some aqua ink to make this sky.
Lastly, I needed a touch of gold to keep this card bright. So I heat embossed this sentiment from the Bright Side stamp set (which you can buy on its own or as part of the Look On the Bright Side Kit—both of which are on sale right now). I also swiped the edges of a panel of white cardstock with Versamark ink and embossed them in the same gold powder as the sentiment. It is just barely larger than my stenciled panel to give it a narrow frame.
I hope that you can look on the bright side and see the rainbows through whatever clouds are in your life right now. Making them with craft supplies really helps, too. I promise.
Much love,
Cheryl
]]>And that was my starting point for today’s card. I love this Stay Golden Word Die! Love it. From the Urban Dictionary, “Stay Golden” means “Stay true, real”. Yeah. How better to cheer someone on who is struggling with confidence or a big decision? As a mom of a high school senior, I thought this would be perfect for him as he starts to make choices about next year.
I kept this clean (like almost always) but tried to make it a bit more wow by using glitter paper with the dies. The Nesting Stars Die Set seemed like a perfect choice to go with the sentiment. I love the overall shape of these and the varied widths make them fun to use together or apart. I added a few gold sequins for a little more shine and decided to call it good. There is only so much “stuff” a high school boy will tolerate after all.
I hope you find some motivation in this no stamping card. And make sure to take a look through Erin’s shop for other sentiments like this that you just need to have. You are sure to find her trend creating products inspiring. Thanks so much for stopping in today. Until next time, Stay Golden!
]]>First, I started by cutting out 5 different color rainbows using some pattern paper that I've had forever. I'm showing this picture, because look at all the rainbows I am going to be able to make after cutting out the paper. I will be able to make 5 cards total! Isn't that awesome! And right now I'm working on sending out cards more so this is perfect to get 5 done and be able to send them out.
Inspiration is everywhere and this weekend I was at Target to buy towels and I walked by their card aisle and a card grabbed my attention. It had a very similiar looking rainbow to Erin's die and I thought I like that layout. So I came home and took some elements (cutting the rainbow and putting the you heart) to make my card. I like bright happy colors which is why I picked these color (the card at Target was more muted). At first I thought about using just one color but I couldn't do it. I just love rainbows!
I used the Nesting Heart Die Set for the little heart which is popped up on my card. The YOU on the heart is part of a sentiment from the Stripe Sentiments Stamp Set. I didn't think just having YOU on the front of the card was enough so I grabbed the Small Script Stamp Set and used part of a sentiment there for the bottom of the card. To make the rainbow, I placed my colors on a piece of grid paper and used some removable tape to adhere it. Then I cut off one side of the rainbow. At first I didn't think I cut enough, so I did a little more. After that I glued each color to my cardstock aligning the first piece up towards the top. After I had glued all the colors I added a cloud panel and the popped up heart. I really like how it turned out and I made 4 more just rotating the rainbow colors.
The Jumbo Skinny Rainbow Die is on preorder since the first round sold like hotcakes. Next shipment is due any day so get an order in while you can! It's definitely a die you'll want in your statsh :) Happy Crafting!
]]>First thing I want to share is that both of these cards were created using a foiled panel. I started with a rose colored cardstock. I then used the Tiny Squares Stencil and applied transfer gel to the 4.25 x 5.5 inch pink panel. I let this dry overnight and then applied pink foil over the top via laminator.
Once I had my foiled panel, I cut it down so that once placed on a whote card front, there would be a nice white border. From there, I strategically used the Heart Nesting Dies to cut out all the nested pieces at one time on the left hand side of my panel.
Once cut, I pulled the large thin heart and the small thin heart from the nest to expose the white cardstock underneath. I set the thin hearts aside for the next card. All of the pink elements were then added to the whole card front. To finish it off I cut 4 white “love” words using the Love Word Die. I glued them together and placed them on the card front.
Now for those thin leftover hearts. On this card, I decided that I again wanted a pretty decent amount of the card front mat around my focal piece. I started with a grey cardbase. Then cut a white scalloped focal piece.
I decided to use the Don’t Sentiment Stamp Set with my thin hearts. I made sure to line up everything before gluing and stamping to make sure all of my elements would fit nicely and look appealing. I then used a liquid adhesive with a fine tip to glue my hearts to my white scalloped panel. I stamped the work “Don’t” and then layered on the “go breaking my heart” that had been heat embossed on black cardstock and cut down to size.
I hope you find these cards inspiring. Until next time, Happy Stamping!
]]>It’s Ceal, here with today’s inspiration. What do you think of the January release? It’s amazing huh?
For today’s card I am using the Sparkling Palms stencil along with the Striped Sentiments stamp set. I did a little experiment with the stencil and I like the results.
To create this card I started with a white top folding card base, a panel of glossy cardstock, Matte Gel medium, the Sparkling Palms stencil, Striped Sentiments Stamp set and the Stripe die.
Instead of using the transfer I used some Liquitex Matte Gel medium. Using a spatula I covered the stencil with matte gel medium and allowed it to dry overnight. Next I took some heat activated foil that is meant to be used with the Gemini Foil Press (I wanted to see if it worked with the Minc), placed it on top, placed the panel in between a folded sheet of copy paper and ran it through the Minc machine. The copy paper wrinkled and this is the result I got and I love it. It has a mixed media wook without the mess. To finish the card I adhered the foiled panel to a white card base and used the Stripe die to emboss the sentiment on.
I love the stay positive sentiment, it’s so fitting for these crazy times these days.
If you are like me and love stencils, Erin Lee Creative has some awesome ones.
I hope you will give them a try!
Until the next time, Stay Crafty!
]]>Here are the cards I've been creating using this release.
Wonder Woman Stamp Set + Nesting Stars Die Set
Rainbow Holographic Cardstock + Yes Girl Word Die + Sparkling Palms Stencil
Bright Side Stamp Set + Rainbow Holographic Cardstock + Jumbo Skinny Rainbow Die
Phew! I created a lot this time, because the products are so good!
Now, let's check out some serious inspiration from the talented Design Members and amazing Guest Designers.
Be sure to comment along the way for your chance to win one of two $50 credits to use in the ELC shop! Deadline will be January 27.
Here is the blog hop lineup:
I started by creating my “flower” which actually uses the Sweet Succulents Stamp and Die Set. I love the flexibility of these images that you can make into a flower as well as a succulent. I found that cutting the die first and then layering on the images in my Misti worked the easiest for lining things up.
After creating the flower and leaves, I thought it would be pretty shown against a light stenciled background. So I pulled out this cool Funhouse Squares Stencil and sponged on a light blue ink. So simple but such a difference maker. Finally I added this sentiment from the Fall Critters Stamp Set. I love this font and it is perfectly sized for a banner.
I hope this inspires you to try a bit of stenciling and to look at images for more uses. I love the Erin Lee Creative products for this! Thanks for stopping in today.
]]>I love using stencils with ink blending. Using blender brushes makes it quick and easy, especially with Oxide inks. (Psst...these blender brushes are on sale, and there are other varieties in the shop as well.)
For the first card, I used warm colors on the Stained Glass Stencil--red blended out to yellow. I love a black sentiment with this color combination, and this Hello Word Die is great. I layered two of them together to give it a little dimension.
For my second card, I used cool colors on the same stencil, but this time, the Happy Birthday Word Die (isn’t that font fantastic?!?) is cut from Holographic Cardstock. All the heart eyes for that cardstock! I love how it pulls in all the blues and greens. Again, I stacked two die cuts together to let it sit above the card a bit. Anyone know how to photograph holographic things well? :)
Stencils are so versatile, and there are so many great ones in the Erin Lee Creative shop. You can use so many fun techniques to get completely different looks, and the price point is fantastic.
And stay tuned! There’s a new release coming on January 20!
Have a fantastic day!
]]>I want to thank each and every one of you, my loyal customers, for sticking with me every step this year - from tackling shipping through a pandemic, new releases, nice comments and emails of support and patience. It’s been a great year for me business-wise and I already have so many great new products ready to launch in 2021.
I wanted to let you all know of one last promotion that will be running until the end of 2020 - which is only a few days away! I have applied an automatic 50% off discount code to the sale category, which gets you some amazing steals and deals! Once 2021 hits, however, that code will expire (still great lowered prices).
So be sure to check out the sale HERE.
I have also lowered the price of the Coffee Lovers Kit from $44.99 to $39.99! WHOO HOO! So be sure to grab yours today.
I also need to announce the two winners of the Coffee Lovers Blog Hop, they will each be receiving a coffee kit, so if you are listed below, be sure to contact me!
Beverly Sizemore
Andre M.
Congratulations!
And last, but certainly not least....a January releasing is coming January 20, 2021! I am very excited to release these uplifting and positive products, and I hope you are too!
Here is a little sneak peek of a few of the items I made into a card.
Have a wonderful New Year's weekend!
xo,
Erin
ps. The lovely Jennifer McGuire featured a couple of my stencils in her My Favorite Things: Stencils video yesterday! Be sure to check it out HERE. So honored and thrilled to be highlighted! Thank you, Jennifer.
]]>
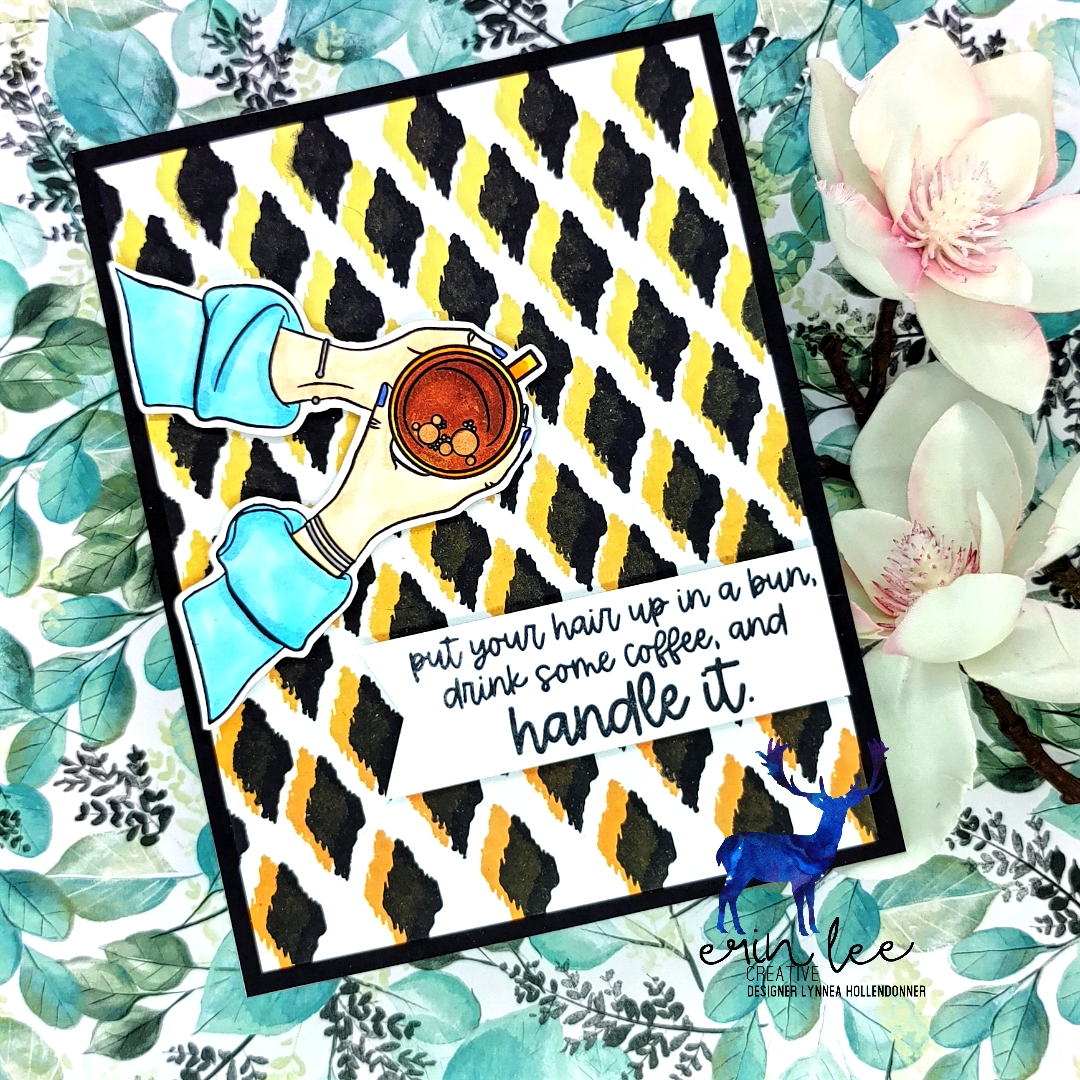
Both of these cards feature images and sentiments from the 6x8 stamp set in the kit. The images in this set really scream “paper piece me” when I look at them. Big open spaces, great for patterned paper pieces.
I had a few 6x6 paper pads laying around that needed some love so I pulled a few pieces out of the stash that coordinate and off to town I went stamping and cutting.
Stamp the image on the white card panel first, then on the pieces of coordinating patterned paper.
Color any pieces of the image that will not be paper pieced before you add the pieces.
Then cut, cut, cut away.
A couple of tips for paper piecing.
1.) When cutting pieces use a small pair of scissors.
2.) Put adhesive on the back of the image before you cut the pieces out. I used double stick tape or my ATG gun. This helps stabilize the paper as you cut and even the smallest pieces have adhesive on them once you are done cutting.
3.) Cut in the middle to outer edge of your stamp line. That way you will get all of the image covered with your cut piece.
4.) Use a grey watercolor marker (I use tombow) and run it around the outer edges of the cut piece to get rid of any white on the edge.
5.) Feel free to add details with markers or pencils to your patterned paper pieces.
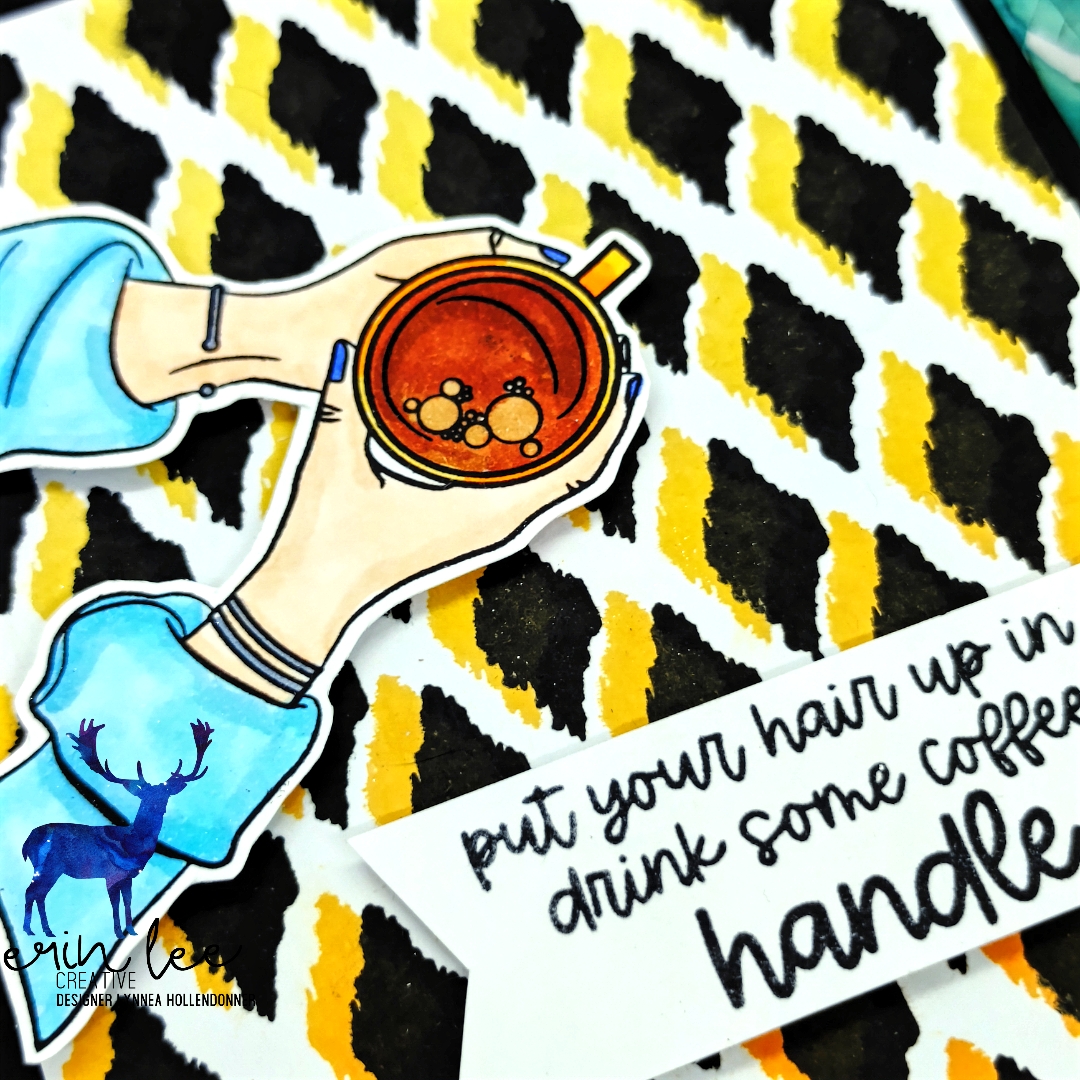
Once the images were colored and the paper pieces added,I added some shading with grey to the sleeves and details to the coffee with a white pen and glossy accents.
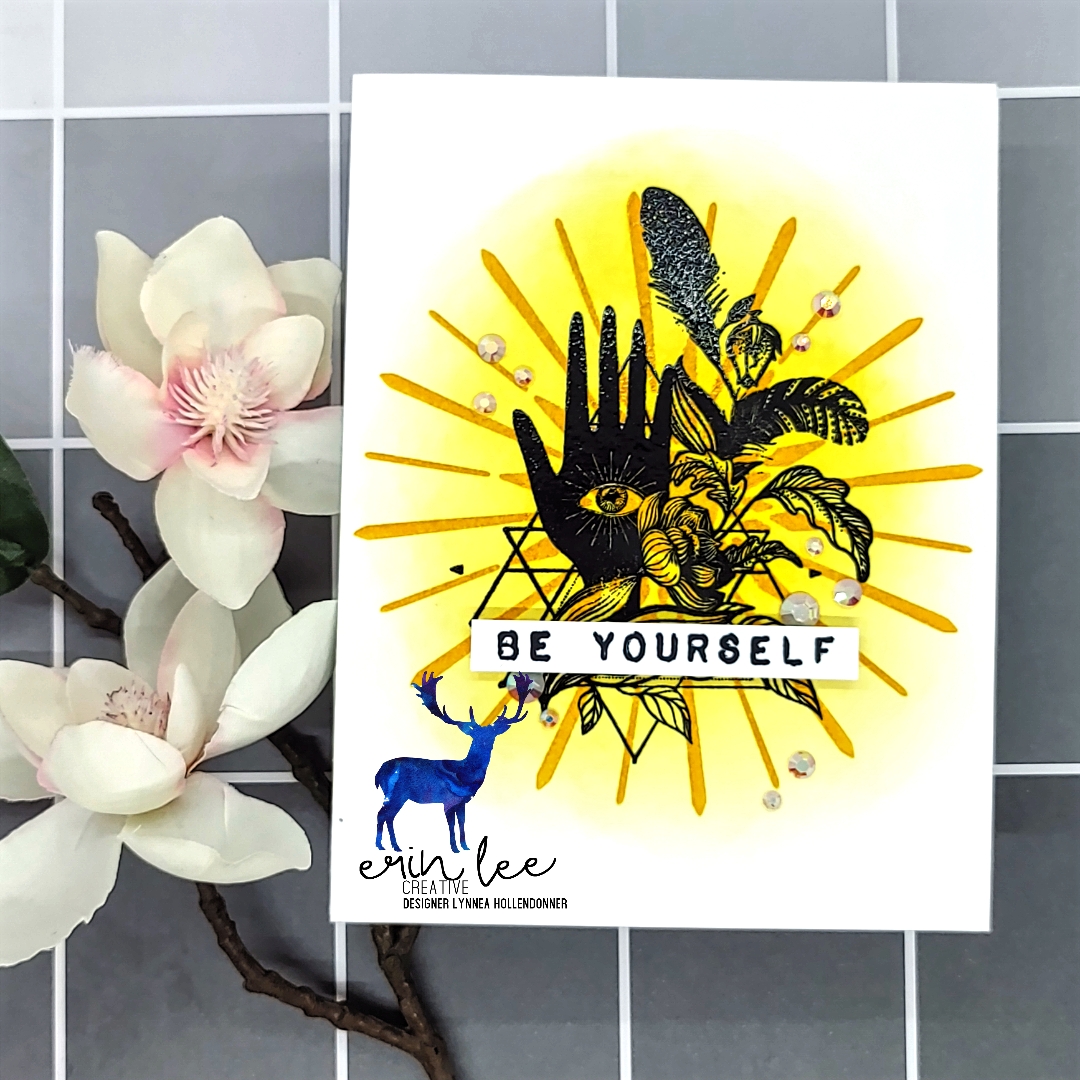
The first card features the Burlap Mesh Stencil behind the stamped sentiment and the second card features the Houndstooth Stencil.
Next up, I tried a little gifty project.
I decided to try a box with a few coffee pods, PERFECT for the theme of the day!
Honestly, I did this “fly by the seat of my pants” style. No instructions, just some measuring and trial an error. I am sure had I looked there are probably instructions somewhere on the internet for a coffee pod box, lol. But why make things easy???
Once I figured out the clear box, I embellished it with some paper scraps cut into strips. I did use the Stripe Die for the bottom piece. I then heat embossed the fun sentiment on the strip piece before applying it to the box.
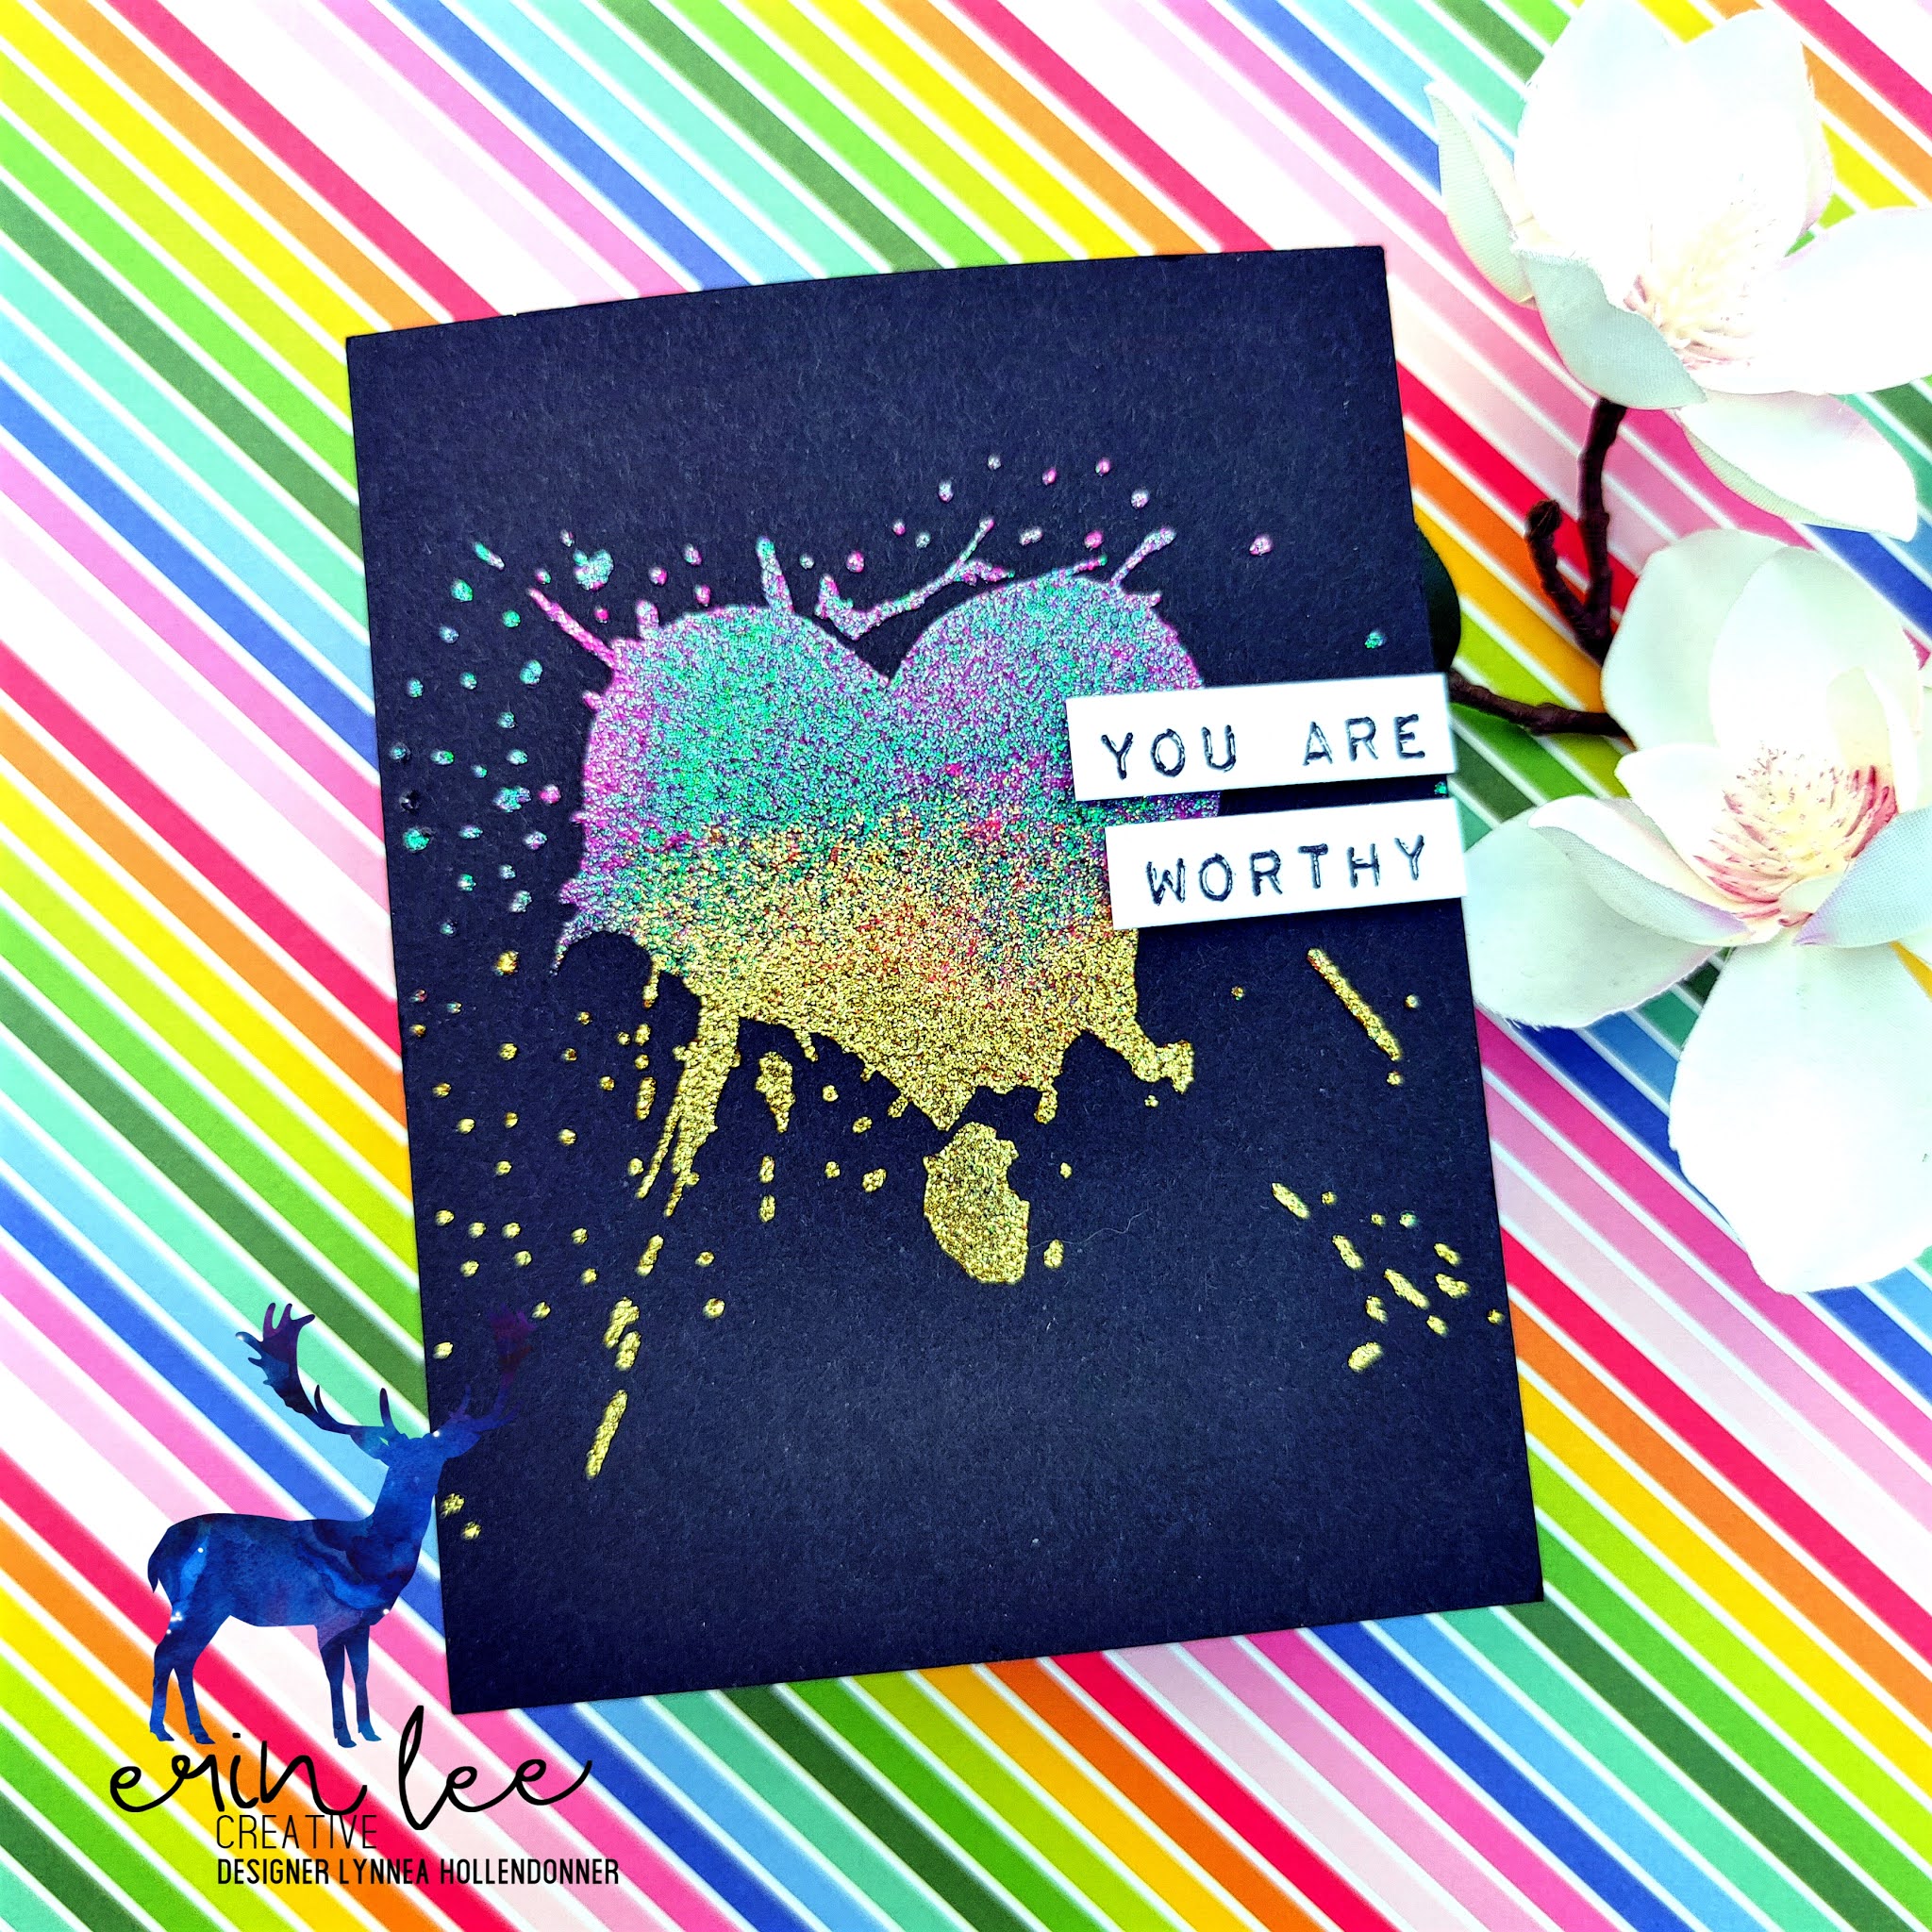
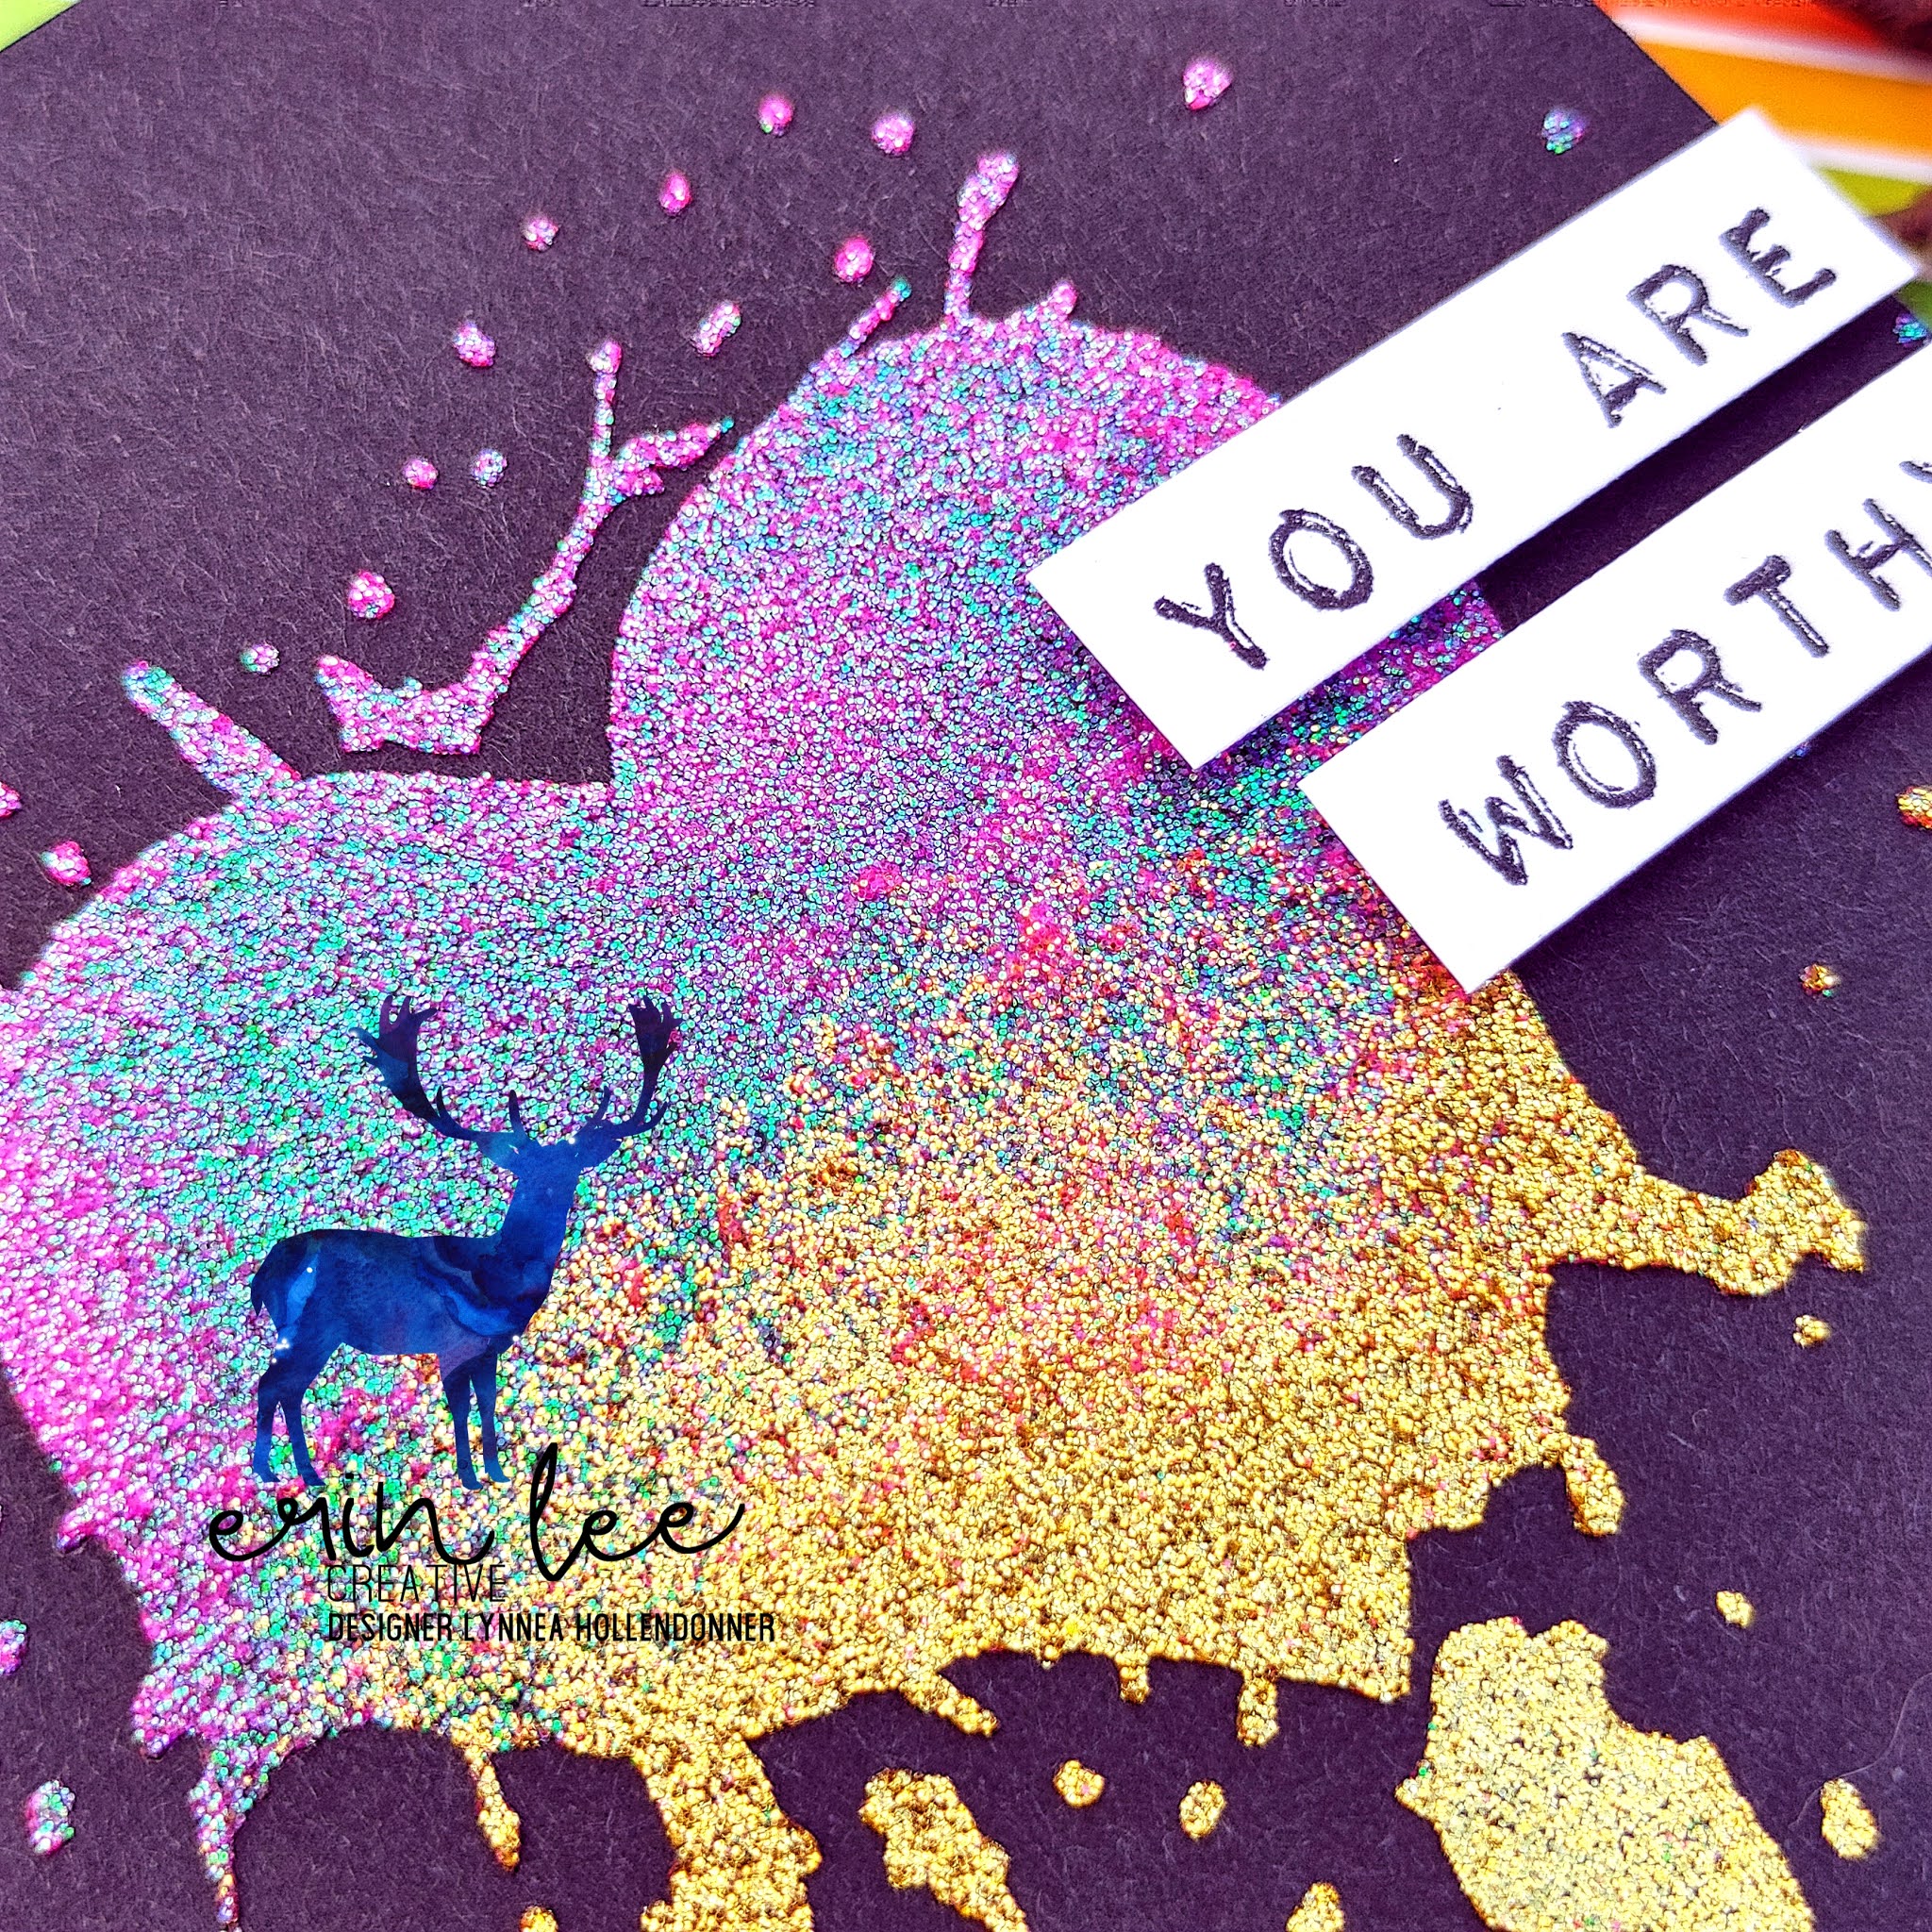
Last, I decided to make a little tag to add to this collection of goodies.
I decided I needed a little glitter goodness added to this group of projects. I used the heart shaped Coffee Lover Image from the 6x8 stamp set in the kit along with the coordinating die. I heat embossed with some sparkling gold embossing powder. So cute and simple!
Here is one last look at all of the projects from today.
There are some amazing sale prices over in the ELC Shop, stop by and check it out!
Thank you for stopping by today. Until next time, Happy Crafting and Happy New Year!!
]]>Its Ceal here sharing a card using the Coffee Lovers kit that was released last month.
To create this card I started with a white top folding card base and some strips of colored cardstock. I stamped the coffee cup image from the Take a break set that comes with the kit, and colored it in a retro theme using Copic markers and cut it out with the Coordinating Die that is sold separately.
To finish the card I added the strips of colored cardstock to the base and popped the image up on top. The sentiment is from the larger set in the kit.
You can now save 15% off your entire order until Dec 31st and the sale category is 50% off. What a good reason to buy yourself a gift right?
Wishing you all a very Merry Christmas and A Blessed New Year!
]]>I love using products in ways that were probably unintended by the designer. And that I what I did today. The Circle Burst Die is one that is so unique and fun to use. But as I was considering a card for today, I realized that I could use it as a star. I love the idea of an abstract star for a Christmas card! I cut some glitter paper from my stash with the die and left the pieces connected. When the die cuts, it keeps all the triangle points with a loose connection that can be easily pulled apart. But easier for me to leave them together. I cut a base from a textured shimmer paper to add a bit more shine.
I popped the circle up on foam tape for dimension. I thought a simple sentiment was best and chose this one from Winter Florals. Stamped on the same paper in Versafine Clair for precise stamping on the textured paper. Finally, I chose a large gem from my stash (yes, I am an accessory hoarder).
There are so many ways to change this up depending on what you have already available and you can make quite a few of them quickly. Thanks so much for visiting today! We so appreciate you!
]]>Here is the blog hop lineup. Be sure to comment on everyone's post today, we have prizes! ]2 lucky commenters will win the Coffee Lovers Kit. Winners will be announced on the ELC blog Monday, December 14. Comment on everyone's blog for a greater chance to win!
For my card today, I kept it rather simple, per usual. I love little coloring cup that is featured on the 3x4 stamp set, so I used that image with the add on die option (it's a must, in my opinion!) I also paired it with a great sentiment from Stripe Sentiments and a striped block I easily created with the Stripe Die.
Have fun hopping, and enjoy your morning coffee! :)
]]>It’s Cheryl, and I’m sharing two cards with you, using supplies from the October and November releases. You’ll see they are very different cards. It’s what I love most about Erin Lee Creative products--they can be mixed and matched and used in so many different ways. You can find anything that fits your style!
First up is an encouragement card made with the Graffiti Heart Stencil, Stripe Sentiments stamp set and Stripe Die.
This was a fun project. I masked off the stencil so I could use two inks. First I blended a hot pink ink where the heart is, then I squished Versamark on the splatters so I could heat emboss in gold. Masking was really simple, so I think I’ll figure out more color combinations in the future!
I then heat embossed this sentiment in white onto some gold cardstock. That Stripe Die is just the perfect size!
I also love how my embossing powder left some glittery bits in the heart as well. Hooray for happy accidents!
Next up is a fun Christmas card, using the Stripe Background stamp, the Star Burst die and a sentiment from the Winter Florals stamp set. That font is so dreamy!
I love the red stripes with the teal! It just reminds me of fun Christmas socks and elf hats! I heat embossed that sentiment over one of the stamped stripes, and it fit perfectly.
But I think the best part is this Star Burst die, cut out of Holographic Cardstock. It’s so hard to photograph, but my goodness, this cardstock is beautiful! I popped up that star on some fun foam for dimension.
I hope this December is a good one for all of you! Merry Christmas, and yes, you are strong!
Cheryl
]]>I took a piece of red cardstock and the Buffalo Plaid Background Stamp inked with black ink to make the background. Good news - that stamp is on sale! Grab it cause it's one you'll definitely use again and again.
Next, I took a piece of white cardstock and stamped one of the florals from the Winter Florals Stamp Set. I then colored it using my Copic Markers. The winter wishes sentiment comes from the same stamp set as well.
Bam! Another Christmas Card finished. And this one would be easy to mass produce...I mean there is some coloring but it's pretty minimal.
Hope you enjoyed the card. Thanks so much for stopping by!
]]>Today, I am sharing a warm and inviting alcohol ink card and a second card using the ink lift off technique. These two cards feature the Sunflower Background Stamp and Stripe Sentiments Stamp Set. Let’s get started!
We will start with the red/orange card first. When making alcohol ink backgrounds for cards, I tend to use glossy cardstock for several reasons. The cardstock (at least what I use) is heavier than yupo, it is gentler on my dies and it is more economical than yupo. I tend to use a lot of isopropyl alcohol or ink blending solution to get the ink to move on the glossy card stock.
On this background I covered the glossy cardstock with red, yellow and orange alcohol inks and let them dry. Once dry, I placed my background stamp in my stamp positioner and used alcohol lift ink to stamp the image onto the colored panel. I placed a dry cloth on the image and gently rubbed my hand over it to pull up the ink. Make sure you do not rub the cloth back and forth or you will smear the image.
Once this was done, I quickly placed my white card panel for card #2 into my stamp positioner and stamped the lifted inkon the stamp onto the white panel and set the piece aside for later.
Once the red/orange panel was dry, I used glittery gold embossing powder to heat emboss the You Are Strong sentiment from the Stripe Sentiment set on to a black strip. I placed the strip on the card front and added some gold embroidery floss for a little extra bling. I mounted the panel onto a black card front to finish it off.
I then moved to the second card front that I had already stamped out. I added an embossed, black sentiment strip and gold embroidery thread then mounted into a white card front. Love the fact that I was able to simply get two cards from this technique.
Thank you for stopping by today, I hope you enjoyed the projects. Make sure to head on over to the ELC shop and grab your stampy goodness today!
]]>Here is my tag using of course some Holographic Cardstock. ;)
This tag was super easy to put together - literally 15 minutes! I used the Woodland Die Set (which happens to be on super sale right now!) with the Holographic Cardstock and Holiday Sentiments Stamp Set heat embossed in white. So fun!
I hope you enjoy the inspiration today. Tracey does a fabulous job putting this tag inspiration together every year.
Have a great Thanksgiving week!
]]>
First, I apologize for the delay in announcing the blog hop winners from the November Release. Here they are!
Lori Lehnen
Dawn Thomas
Please email me and I will get you a code to use in the shop. Congratulations!
Next, we have a HUGE week coming up. Please be sure to subscribe to the newsletter because I will have a ton of info and sales I will be sharing there, including an exclusive release on Black Friday and other deals.
We have a great sale running right now for Thanksgiving week, be sure to shop early for the best selection. A lot of our products are very low quantity, and the sale category prices are insanely low.
See you tomorrow for a special blog hop for Tracey McNeeley's 25 Days of Tags and Monday for the newest Coffee Lovers Kit Release!
]]>
I sprayed the back of the Graffiti Heart Stencil with Pixie Spray and used the grid lines to help me center it onto a piece of black cardstock. I added two colors of Glitz Glitter Gel over the top of the Stencil - Poppin' Pink Neon Glitz Glitter Gel at the top and Gold Glitz Glitter Gel on the bottom half. I used my palette knife to make sure the two colors of Glitz blended together and set the panel aside to dry for about a half an hour.
I stamped the sentiment from the Stripe Sentiments Stamp Set onto a piece of white cardstock that I cut with the Stripe Die. I love how easy it is to cut perfect sentiment strips! I decided to trim down my strip into two pieces so that I would have a stacked sentiment and added them with foam tape to the right side of my card.
Hello everyone!
It’s Ceal here to share a few Christmas cards with you today. I love stencils and Erin Lee Creative has some amazing layering stencils that I created a few Christmas cards with.
The first card uses the Pine Layering Stencil which happens to be on sale for $9.99.
I placed the stencil down and blended some pink ink for the second layer I used some transfer gel and then foiled it with bright pink foil.
My second card uses the Tie Dye Layering stencil, which is on sale for $12.99. To create this card, I blended gold ink on the first layer, red on the second and green last. The sentiment is from the Winter Florals set. I used that sentiment on all three cards.
My last card uses the Camo Layering stencil, which is also on sale for $12.99. This one you could send to your military friends for Christmas. To create this one I used two different green inks and a gold. I used the Star Burst die to cut out of the center. And then embossed it on the gold. ]]>I’ve paired this sentiment with this great mountain sunrise stamp from Stay Wild. My favorite thing about Erin Lee Creative supplies is they can be mixed and matched together so well.
My first card is pretty straightforward--good for a masculine card with no frills, and very easy to mass-produce, too.. It is just heat embossed in white on navy cardstock, backed with kraft.
This second card is a little more involved, but with the exact same placement. This time I ink blended some colors to mimic a sunrise. This might be my new favorite autumn rainbow!
Every day IS a new beginning, and after stormy nights, I am always so grateful for mornings!
One last thing...Today is the last day for this incredible sale! Go check it out and stock up while supplies last.
I hope this day is a good one for you, with new and wonderful things coming your way.
Cheryl
]]>I used the Striped Background Stamp to make the strip. I used the Stripe Sentiments Stamp Set on a piece of white cardstock diecut with the Stripe Die. I then used the Heart Burst Die on a piece of Metallic Magenta Cardstock (which is on sale) to add a pop of color. It's a little hard to see so here is a close up:
I splattered some sparkle white watercolor on the black panel just to give it a little more shimmer.
Be sure to check out all the new release products here. Thanks for stopping by!
]]>